Showing posts with label distress. Show all posts

Monday, September 27, 2021

Crystal Lingo


Hi everyone. I have a couple of cards I made for Poppystamps using the Crystal Lingo slimline stamp.
I clear heat embossed the image onto watercolour paper, smooshed Distress Inks ontop, sprayed it heavily with water and let it dry.


I'ts a fun design that is great for a lot of different occasions. For more info on how I made the card please stop by the Poppystamps blog here.


Have a great week!

Monday, November 16, 2020

Galaxy Christmas


 Hello crafters! Today I have a Christmas card with a galaxy sky background!

I used my Distress Inks to create a night sky to showcase Poppystamps Simple Lantern Oval die with a little wintry scene.


It was my first time making a galaxy sky and it was a lot of fun getting inky!

For more info on how I made this card and all the products I used please stop by the Poppystamps blog here.

I'm entering this card for the Simon Says Stamp Monday Challenge, Happy Holidays, found here.

Have a wonderful week!


Monday, September 28, 2020

Rainbow Ghosts

I have a colourful and spooky (okay, not spooky, just cute) Halloween card up at Poppystamps!


I did some rainbow inking of the friendly Squeaker Ghost and love how this turned out!

For all the details please stop by the blog here.

Have a great week!


Monday, September 14, 2020

Maple Symphony

Happy Monday! Today I'm up at Poppystamps with my first fall card of the season! I love leaf stamps and dies especially when I can ink them up in colourful Distress Inks!


For all the details on this card please stop by the Poppystamps blog here!

Wishing you a great week!


Monday, February 1, 2016

Crazy In Love


There's a new challenge starting today over at Poppystamps and this month we're Crazy In Love! We want to see your interpretation on this theme and you have all month long to play.


I decided to make my card masculine. That means no pink, glitter or lace and such.

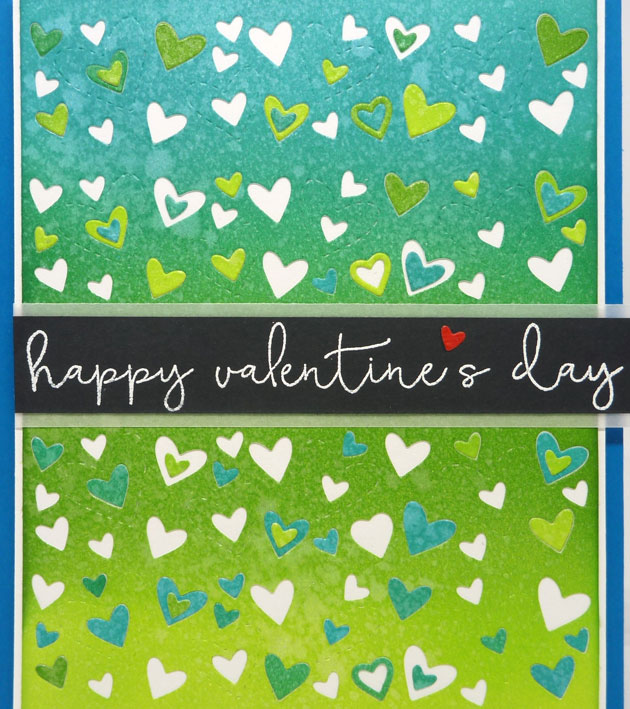
I inked up my background with Distress Inks in Twisted Citron, Mowed Lawn, Lucky Clover and Peacock Feathers and gave it one spritz with Perfect Pearls and a few flicks of water.


I die cut the new Shimmering Heart Border 4 times and adhered it to a white panel. Then I took all the hearts that were die cut from the background and added them back in throughout the design.


The sentiment is from the Be Mine Penguin stamp set and it was white embossed on black card stock and layered onto vellum. I finished off with one red heart.

I hope to see your projects over at Poppystamps and don't forget that the winner will receive a die from the new release!

Thanks for stopping by today!


Sunday, November 8, 2015

Share Handmade Kindness

A quick post today with a card for Jennifer McGuire's Share Handmade Kindness Challenge. If you haven't heard about it, it's a month long event with different challenges each week. Please check out all the details here.


For my card, I clear embossed my image onto watercolour paper and smooshed and painted on Distress Inks in Faded Jeans, Chipped Sapphire and Seedless Preserves. Love these colours together! I white heat embossed the sentiment, added some silver thread and Sparkling Clear Sequins from Pretty Pink Posh.


My card is for my sister. She is a huge part of my life and I love her dearly! She lives in the same city as me but I'm going to mail it to her, she'll be so surprised!


Thanks for visiting me with today! #sharehandmadekindness


Friday, March 6, 2015

Easter

Here's a couple of cards I made for the upcoming Easter holiday.

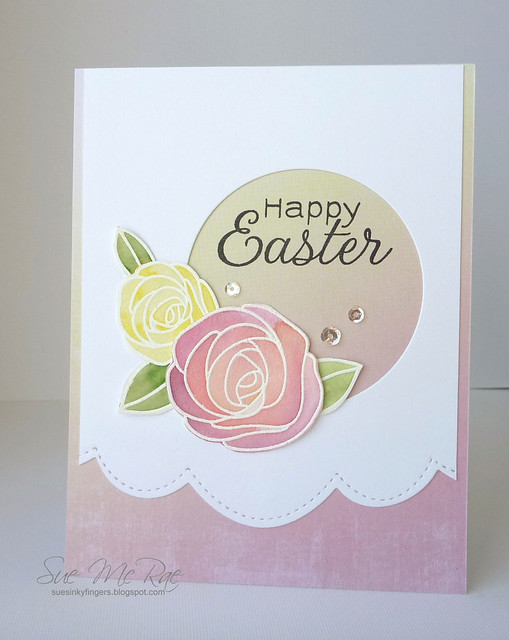
This first one uses the flowers from Simon Says Stamps Best Mom Ever set.

P1260722c

I watercoloured the flowers and leaves with Distress Markers and applied Wink of Stella for some shimmer.  It was my first time using my new Pretty Pink Posh border die to add a wonderful feminine edge and I just had to use a few of the Sparkle Clear Sequins to finish off the card.

My next card is very simple but I love how it turned out.

P1260706c

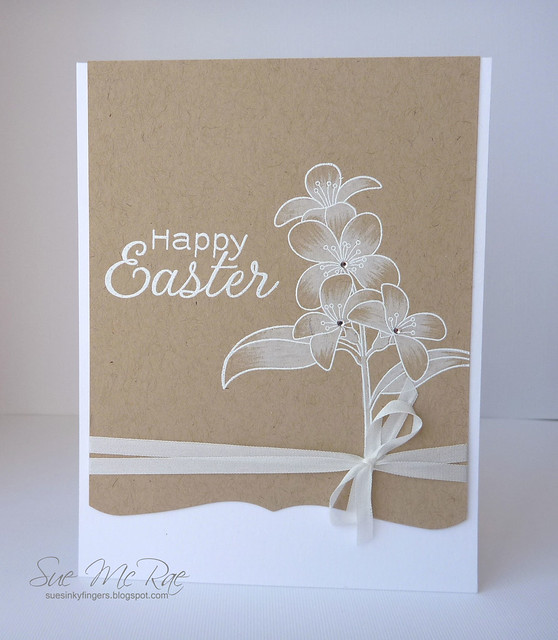
I white embossed the Fresh Flowers stamp from Clearly Besotted and coloured the flower with white pigment ink and a water brush. Love how it looks on kraft card stock.

I added a decorative edge with a die and finished off with some silk ribbon and clear gemstones.

I'm entering the top card for Simon Says Stamps Wednesday Challenge, Special Lady/Girly Card.

Thanks for taking the time to visit with me today.


Thursday, February 19, 2015

It's A Hero Arts Hostess Hop!


Hi everyone and welcome to the Hero Arts Hostess Hop where we're featuring products from the new 2015 release.

If you have been following along, you’ve just arrived from Heather's blog.

Hero Arts will be awarding prizes from randomly drawn comments. For a chance to win, simply comment on ANY of the stops along the hop on ANY day, including each day’s starting post at the Hero Club Blog. The more comments you leave, the better your chance of winning!

If you find a broken link, you'll find a master list of the hop links at the Hero Arts Club Blog here. Also, please report broken links to: blog@heroarts.com.

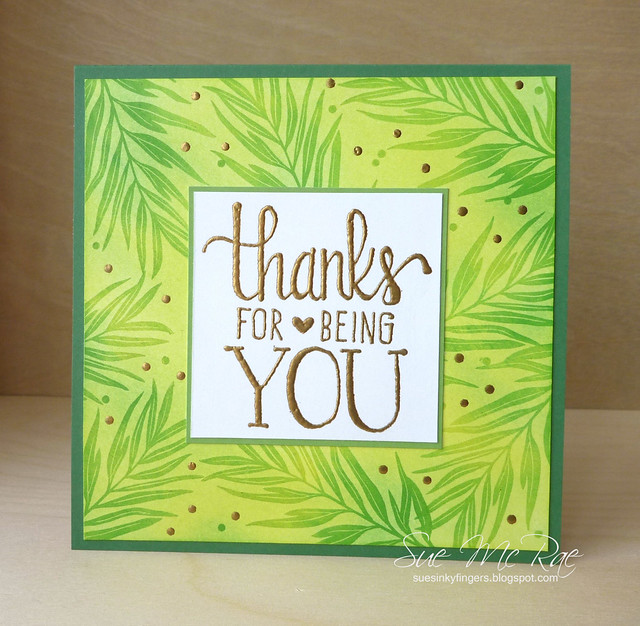
For my first card I used Hero Arts Stamp Your Own Plant set with Panpastels.

Sue McRae HA Hostess Hop Feb 2015 Leafy Background

I stamped the leaf image with Versamark and applied two different shades of green Panpastels on top. I added little dots throughout the design that I embossed in gold and finished off with a gold embossed Thanks For Being You sentiment.

I used the same leaf image on my next card for a totally different look.

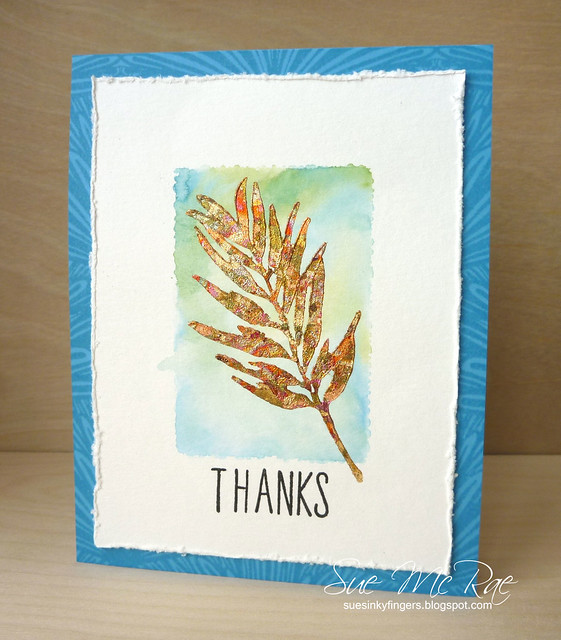
Sue McRae HA Hostess Hop Feb 2015 Gilded Leaf

First, I scribbled some Distress Markers onto an acrylic block, sprayed it with water and stamped it on watercolour paper to make a background for the leaf.

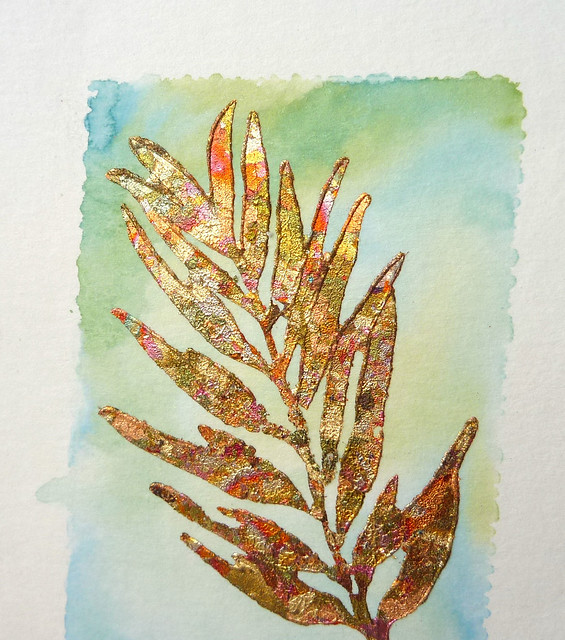
Then I applied some wet adhesive to the leaf stamp, stamped it onto the paper and covered it with gilding flakes (metal leafing).

Here's a closer look at the variegated colours from the gilding flakes.

Sue McRae HA Hop Feb 2015 Closeup Gilded Leaf

I took alphabet letters from the Stamp & Cut Flag set to create my own sentiment and did some tone-on-tone stamping with the Tropical Background stamp on the card base.

The products I used for the gilded leaf can be found here and here. There are also a couple of videos on those pages to see how it's done.

That's it from me today.  Your next stop on the Hero Arts Hostess Blog Hop is Marcy.

Thanks so much for hopping along with us today!


Hero Arts Products Used:
CL834 Stamp Your Own Plant
F6069 Thanks For Being You
PS601 Pine Layering Paper
PS622 Foliage Layering Paper
CG659 Tropical Background
DC136 Stamp & Cut Flag
AF183 Cerulean Chalk Ink
PS605 Cerulean Layering Paper


Tuesday, February 3, 2015

Bokeh Hearts

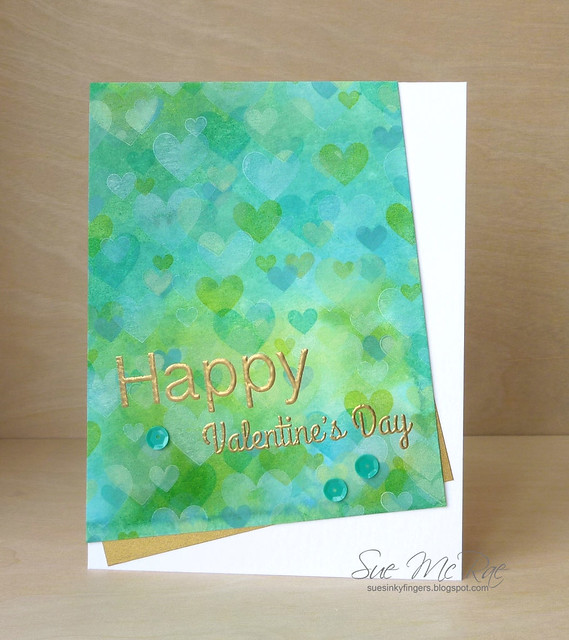
I tried to capture the bokeh effect using hearts instead of circles for this Valentine's Day card.

Bokeh Hearts

I used Distress Inks to create my watercoloured background and inked up Simon Says Stamps Tons of Hearts images in a variety of coloured dye and pigments inks and white dye and pigment inks. The sentiment was gold embossed with Simon Says Stamps Essential Greetings and I added a few sequins to finish off the card.

This is a great card for a guy.  Nothing frilly, feminine or sparkly happening here.

I'm entering this in Simon Says Stamps Flickr Love Challenge #11.


And Simon Says Stamps Anything Goes Challenge.

Simon Says Stamp Wednesday Challenge Blog

Thanks for visiting with me today!

Thursday, December 18, 2014

Camouflaged Die Cut

The challenge at Papertrey Ink this week is to use a camouflaged die cut.  Laura Bassen has a video and great card showing the technique.

Sue McRae PTI Camouflage Challenge

I started by inking up my panel with Distress Ink in Festive Berries, Ripe Persimmon and Squeezed Lemonade and then spritzing it a few times with Perfect Pearls.  The leaf was die cut once out of the panel and 4 times out of white card stock and adhered together for one thick piece that was fitted back into the negative space.
I think my leaf piece is a bit too camouflaged. I should have stopped my inking sooner so that the leaf would have had some white showing.  Perhaps a redo is in order!

I'm also entering this for Virginia's View Challenge, All Things Distressed.


Thanks for visiting with me today!

Tuesday, September 16, 2014

Simon Says Flickr Challenge

Simon Says Stamp has started a new bi-weekly challenge on their Flickr site and it's being run by the fabulous Barb, whom we all adore!

This first challenge is a colour challenge and the rules are pretty simple.  Use at least 3 out of the 5 colours and use at least one Simon Says Stamp exclusive brand product on your project.


I used 6 dies on this project (yikes that seems like a lot) and four of them are by SSS.  One is from Poppystamps and one is from Papertrey Ink.

SSS Butterfly Birthday

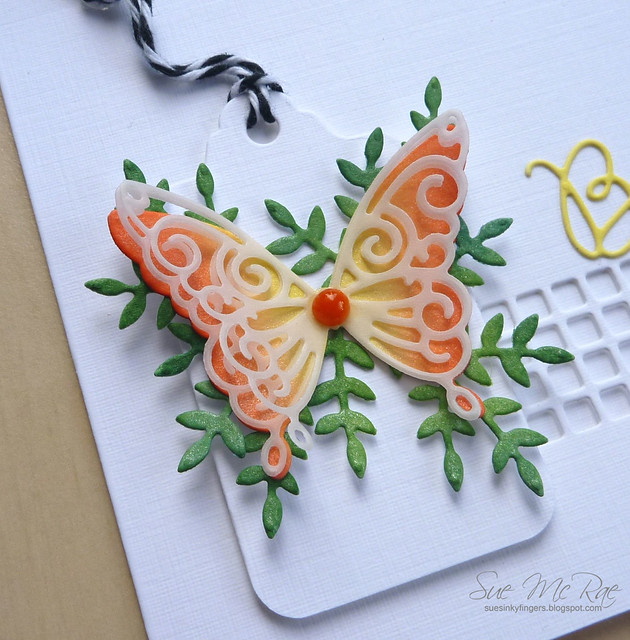
I inked up the solid butterfly with Distress Inks and added 2 layers of the overlay die cut in vellum.  I coloured the Birthday die cut with Squeezed Lemonade and the Leafy Sprig die cuts in a couple shades of green Distress Ink and sprayed everything that was inky with Perfect Pearls for a little shimmer.

SSS Butterfly Close-up


Thanks for dropping by!


Saturday, August 23, 2014

Blog Hop at Pretty Pink Posh


Pretty Pink Posh is having a Cutting Edge Blog Hop this weekend.  You can create a project that incorporates at least one die and upload it over here.

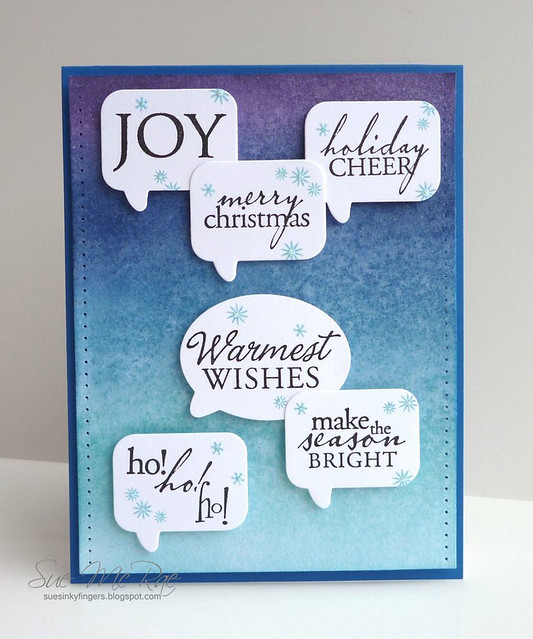
I made another Christmas card for the hop, this time using a lot of Distress Inks and some Phrase Bubble Dies from Hero Arts.

Speech Bubble PPP Cutting Edge Hop

I created an ombre background using Distress Inks in blues and purples and sprayed the piece with Perfect Pearls for a little shimmer.

I gathered up an assortment of holiday sentiments from Hero Arts and stamped them onto a bunch of die cut Phrase Bubbles.  I added some tiny snowflake images onto the die cuts and added little dots of Stickles to the centre of each snowflake.

I think this is a fun nontraditional holiday card and will likely create some more Distress backgrounds in other colours to make additional cards.

I'm also entering this card at A Blog Named Hero for the Ombre Challenge.


Thanks for stopping by and wishing you an inky weekend!

Saturday, July 12, 2014

Sharing The Love

I'm Sharing The Love of Distress Inks with a couple of cards for the Winnie & Walter blog.

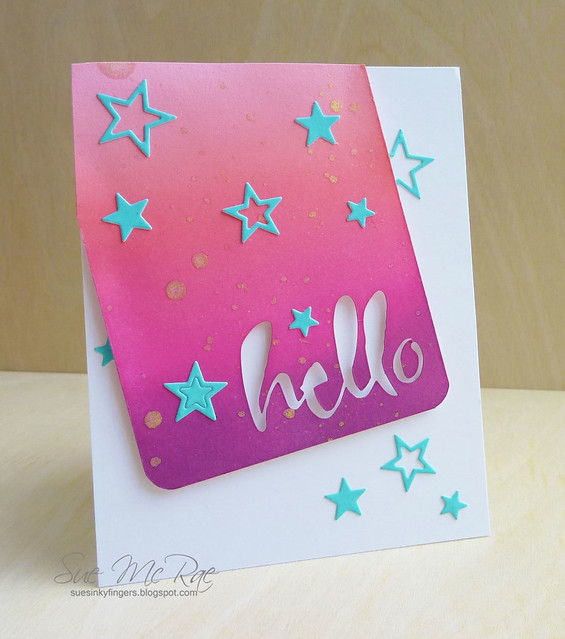
My first card is for the Ombre Challenge.

W&W Ombre Hello

I used W&W's The Big, The Bold and The Happy cut file for the journaling card and inked it up in Spun Sugar, Worn Lipstick, Picked Raspberry and Seedless Preserves. I added some paint specks of Heidi Swapp Gold Color Shine and a few stars from Memory Box.

My next card is for the Stencil Challenge and it is....well....busy and bright. I thought I would mix some patterns and I'm not happy with the outcome but crafting is all about experimentation right?

W&W Stencil Hello

I cut a couple of tags from W&W's Daily Grind Collection: Holiday Mint Add-On. I cut the Diagonal Stripe Journaling Card from  W&W's Cut File Basics vol. 1 to make a stencil and create the stripy lines in Squeezed Lemonade and Festive Berries on the tag.

W&W Stenciled Tags

The "hello" is from the same cut file as the first card and I inked it up in Black Soot, added some sparkle with a Wink of Stella pen and a layer of Glossy Accents.

P1230324c

The background is the Mini Tiny Circles Stencil from Crafters Workshop inked in Peacock Feathers.  I also dyed the seam binding with Peacock Feathers.

Thanks for visiting and hope you manage to get a bit inky this weekend!


Thursday, July 3, 2014

Ombre With Winnie & Walter


Winnie & Walter are sharing the love of Distress Inks and have a few challenges on the go.

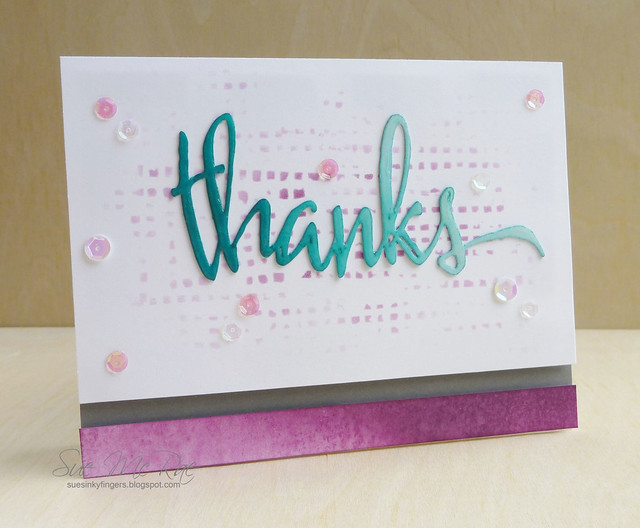
I made a card for the Ombre Challenge using The Big, The Bold and You cut files.

Ombre Challenge @ Winnie & Walter

The thanks die-cut was inked up with Peacock Feathers Distress Ink, the strip along the bottom was inked with Seedless Preserves, going light to dark, and spritzed with Perfect Pearls and I used a stencil with Seedless Preserves to add some texture behind the sentiment.

I finished off with a few (too many, I think) sequins and Glossy Accents over the sentiment.

Stop by to see the wonderful inspiration on the W&W blog!

Wishing you an inky day!


Tuesday, October 29, 2013

A Little Inky

I played around with some Distress Inks to make the inky background for the butterflies.  I'm really loving the colour combo of Chipped Sapphire, Faded Jeans and Seedless Preserves and thought it would look great on a black card.
P1200664c
I sprayed the distressed piece with Perfect Pearls for a little shimmer and stamped the Social Butterfly from Penny Black in white dye ink on top.

The card base was clear embossed with Penny Black's Paisley Outline for some subtle texture and the sentiment is from their Gratitude set.

I just got the Large Flourish Die (I consider it to be more of a leafy stem) from La-La Land and wove it around the butterfly panel.

Here's a close-up of the embossing and shimmering.
P1200669c

Thanks so much for stopping by today!

Monday, July 15, 2013

Inspired By Hero Artist At A Blog Named Hero


It's the 15th of the month so that means a new challenge is up at A Blog Named Hero.  The theme for this challenge is to pick a Hero Arts artist and create a project inspired by them.

I picked Shari Carroll because she has such a great way of layering stamping, colours, papers and patterns. I know Shari left Hero Arts a few weeks ago but she was fundamental in helping to shape Hero Arts for the past 24 years so I couldn't help but pick one of her cards.

I was inspired by this card from Shari, starting with the watercolour background and her walk and wiggle watercolour stamping. You can check out a video here from Shari on how to do the walk and wiggle technique.
Sue McRae Fave HA Artist Jul 15 2013
Shari likes to use a lot more earthy tones in her cards and I'm all for bright and bold colours (with a touch of shimmer from a Wink of Stella Marker).

Now it's your turn to create something inspired from a Hero Arts artist.  Make sure to specify in your post which artist and project you were inspired by and submit your creations over at A Blog Named Hero.


One lucky crafter will win a $25 gift voucher from Simon Says Stamp to purchase some goodies.


I can't wait to see your projects!